Make Your Own Bouquet
Making a Bridal Bouquet
with Floral Arranging Instructions
|
|
|
|
As bridal bouquets come in varying sizes, colours and types, there are no rules. It's your wedding, your party. Just keep in mind the style of your wedding gown, as your height and size will be the determining factor.
Fairy godmother tip: the temptation may be strong, but don't overpower yourself with a large floral arrangement if you are only petite.
The most exciting part of all is choosing your blooms. If you don't know much about flowers though, do some research, our article on flower meanings, flower dictionary with pictures and our birth flower meaings article may help you start the ball rolling. By knowing the meanings of flowers, it can certainly add a personal touch to your flower arrangements and your wedding day.
 Free your mind from any expectations and follow your heart and your wedding will be truly memorable and perfect.
How to Make Wedding Bouquets
In this video you will learn how to make wedding bouquets with ease with floral arranging instructions. You will not only impress your fiance and friends but your guests as well, when they find out it was your own creation, they will all watch in awe as the perfection of the day unfolds.
Video Narration: Further down below on this page we also have the written version of the narration of this make your own bouquet video, for those of you who do not have sound on your computer or if you have a hearing impairment.
(Show Me How - Wedding Flowers sample
- duration of video 9:00 minutes)
Making a bridal bouquet
Below is the writen narration of this video with floral arranging instructions:
This stunning bouquet of classic ivory roses features blue green Eucalyptus foliage that high lights the roses beautifully plus delicate wired crystal beads which could be matched to the decoration on the brides dress. The display is created using the spiraling stems method giving a doned affect to the bouquet centre and adding strong design element with the formation of the stems. The stems are bound with broad satin ribbon and then with organza ribbon secured with pearl headed pins.
You'll need to pre-prepare a couple of things before starting to create your bouquet.
1. Cut a 1 metre length of garden string double back about 30cm of this at one end and form a loop, double knotting this to secure. You'll need this to bind around the stems of your finished bouquet and you won't want a laid bouquet down at this late stage to prepare the string.
2. You'll also need 2 or 3 pre-cut lengths of adhesive floristry tape often known as pot tape. Cut about 60cm from the reel and stick it to the edge of the table ready to use later.
3. Take you conditioned roses and strip away the remaining sets of leaves and torn petals. Prepare all the roses your going to use, around 19 or 20, in the same way. Dispose of the leaves but keep the torn petals if you like. They make wonderful nature confetti.
4. Put the roses back in water until you need them. Take your conditioned stems of Eucalyptus, cut off the side shoots and snip into short and varying lengths, about 30cm on average. Cut long shoots in half to do this if necessary. Strip the leaves off the lower half to two 3rds of the stems. some leaves will pull off quite easily others will have to be stripped away individually.
5. Take about 12 of the beaded wires that you've already prepared and the roses. Start with a rose and lay a length a of foliage across the stem at about a 45 degree angle. Grasping the stems in one hand, twist or rotate slightly and add in a beaded wire also at an angle, rotate again in your hand. Lay another piece of foliage across the stem at an angle, twist, add another rose then more foliage and a beaded wire rotating after each addition. Hold the bouquet stems in one hand, not so tightly that you get a cramp in your fingers but firmly enough to keep them secure. Use the other hand to pick up and add the material.
6. The aim is to create a domed centre of the bouquet with the sprigs of foliage and beaded wires standing slightly proud of the flower heads. Make sure you add your material to your bouquet at the same angle each time and rotate the bouquet in the same direction so that the stems spiral out evenly below your hand. Wrap your prepared string around the stems of the hand point and thread the free end though the prepared loop. Wrap it around several times in the same place and tie the loose ends together with a double knot and trim.
7. Bind the prepared tape over the string keeping the binding as neat and as narrow as possible. Now you need to cut the stems down, but not to their final point yet, just to shorten them. Grasp the stems and cut across using sacateurs.
8. Fold back the ends of the beaded wires alligning them with the tape so that there are no sharp ends of wire within the stems of the bouquet. Check through carefully to make sure you found them all. Wrap another piece of pot wire around the wires over the top of the previous tape to bind in the ends. It helps if you pre-cut a piece of tape before you reach this stage.
9. If your bouquet is not going to be needed for a while, sit it in water until your ready to continue working on it. When you are ready to continue use the hot glue gun to put a dab of glue on the tape binding the stems. Keep some water handy at this point.
10. Attach a length of broad satin ribbon to the glue be careful with your fingers and the hot glue and then bind the stems firmly overlapping the ribbon as you go. Bind down the stems for about 10cm then cut the ribbon. Put a dab of glue on the binding and glue down the loose end, again being careful of the hot glue.
11. Take the wide organza ribbon trim away any loose wires sticking out at the ends then wrap it around the satin ribbon a couple of times to secure. Don't use the hot glue gun, the glue will show through the organza. Bind it around 6 or 7 times to cover the satin ribbon and soften the affect. Work your way back up to the top. Fold under the raw edge and secure with pearl headed pins. These may be quite hard to push in as they are actually going into the stems, they need to do this rather than push between the stems, as they could then prick the brides hands. If they bend, pull out then replace. Rub away any dirt that has attached it self to the pins
Materials used in this video: Make your own bouquet
1. Garden string
2. Adhesive floristry tape or pot tape
3. 20 ivory coloured roses
4. Eucalyptus stems
5. 12 Beaded wires (wired cystal beads)
6. Sacateurs
7. Wide satin ribbon
8. Wide organza ribbon
9. Pearl head pins
![]()
VIDEO TUTORIALS:
|
1. Make a Large Wedding Flower Centerpiece:
|
2. How to Make Your Own Bridal Bouquet:
|
3. Make a Hand Tied Calla Lily Bouquet:
|
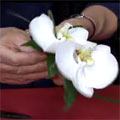
4. How to Make a White Orchid Corsage:This simple
|
5. How to Make a Wedding Candle Centerpiece:
|
6. Make a Pomander Flower Ball Centerpiece:
|
7. How to Arrange Flowers For a Small Vase:
|
8. How to Make a Boutonniere:
|


![]()
|
|


